Working with PHP GD Image to Dynamically Create an Image
Now that I have the correct max date query pulling the “To The Moon” coins list, it is time to work on creating an output image to let people share it with the world.
From previous experience working with my website, before WordPress was WordPress, I knew that PHP had tools for manipulating images. I figured, I could take several images and text and combine them together to create a shareable image for each coin. While there is a great PHP image manipulation tool called ImageMagick, I am limited to the [GD image tool](http://php.net/manual/en/ref.image.php) installed on my website provider. I’m sure there are ways I could use GD to do even more things with the image, but I wanted to get something working without putting a ton of time and effort on it.
Since “To The Moon” needed to represent a crypto coin launching out into space and reaching the Moon, I wanted something that would be easy to visualize representation. Each coin would be represented by its icon symbol, which I found from CJ Downer on GitHub. CJ Downer had created black and white, color, and button icons for over 200 coins and is doing his best to keep them up-to-date. I hope to give him a type in cryptocurrency, once I have enough to tip.
Next, I had to decide on the overall image would look. I initially wanted to do a rocket, but that’s basically a standard look. A couple of cryptocurrency enthusiasts I know suggested using an image similar to the Telsa Falcon Heavy launch. Luckily, I took screen shots of Rocket Man while it was circling earth before it was sent off into space. Since the Tesla / Space X folks had a sense of humor, they put “Don’t Panic” on the screen where the radio was, which helped narrow down which image I was going to use.
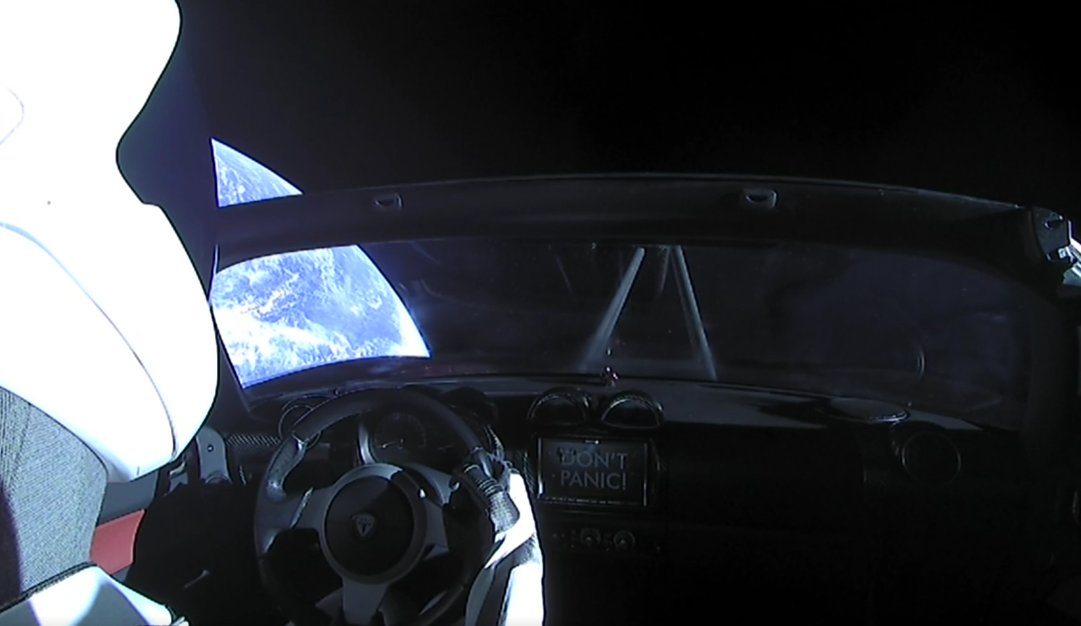
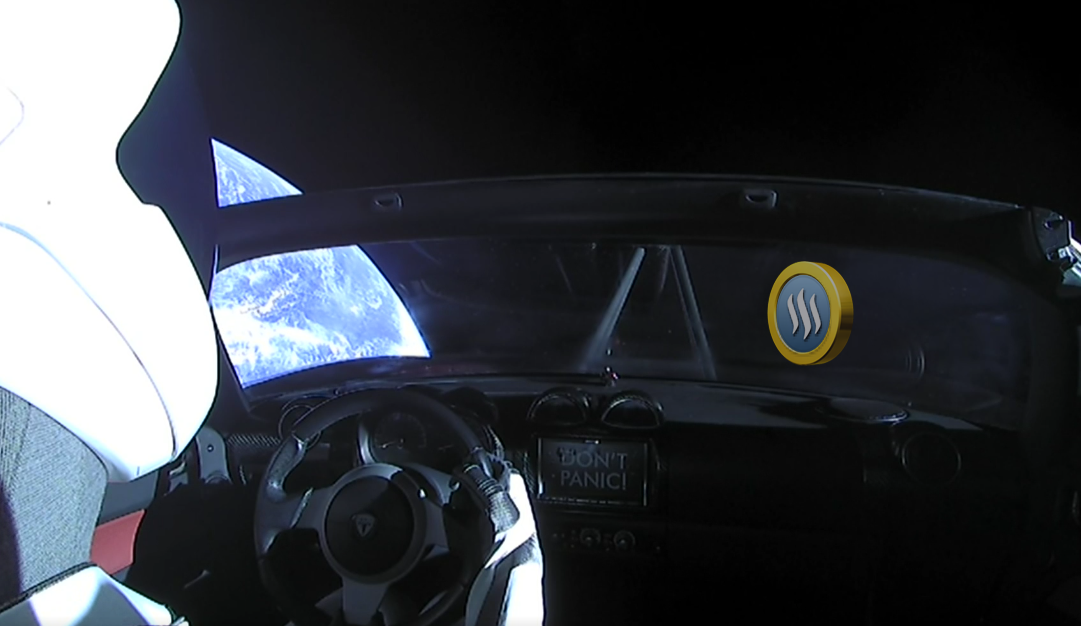
From this image, I wanted to make sure that it looked like the coin was out in space, so I made a layer from the windshield where the coin would be “floating”. The layer is not 100% opacity, so what I put below it, should show through. I created the final image in Photoshop, so that I could get each layer that I needed.
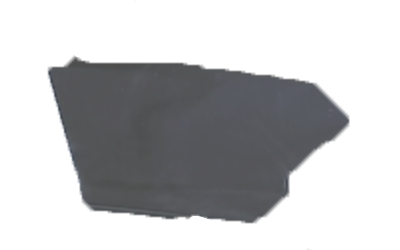
I also needed a blank coin to add the selected coin on top, to give it a single coin look. I originally wanted to show a coin at an angle, but using GD to skew the crypto icon image turned out to be too much of a chore, so I chose to keep it head on.

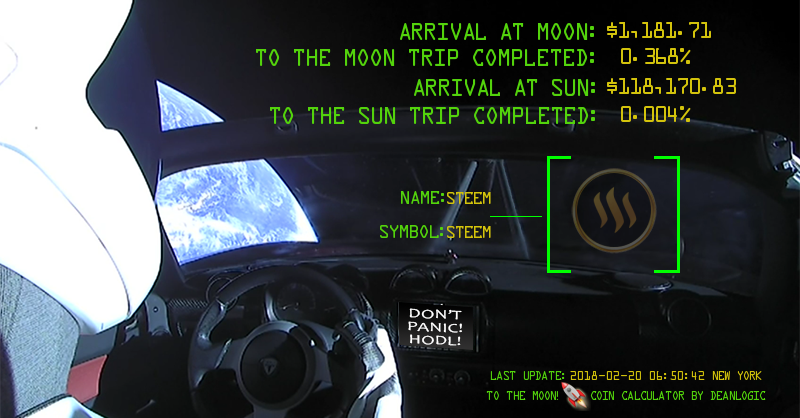
This was my original test image with the angled coin. Maybe in the future I will figure out how to do it. I probably will require doing some sort of batch job in Photoshop to alter each of the coin icons and then uploading them to my site.
Now that I have the images, it was time to put them together.
First, I had to make the output file value.
// set output image name
    $outputFile = $basedir . 'covers/' . $coin['coinSymbol'] . ".png";
If the coin had previously been created, I need to remove it before creating it again.
// delete the image if it already exists
if(file_exists($outputFile)) {
   unlink($outputFile);
}
Now, I can start creating the output image by creating the first image from the base image.
// create base image
$baseImage = imagecreatefrompng($baseImageName);
Before I add the coin to the base image, I combine the background coin with the icon. When I add the icon, I need to resize it to fit inside the coin and position it to be centered. The magnify value is what shrinks the icon to the right size, which took several attempts to get it the way that I wanted to. Once the two images are combined, I can added it the base coin.
 // add background coin
 $goldCoin = imagecreatefrompng($basedir . 'CoinFrontNoFace.png'); //110 x 110
// add crypto coin symbol
$cryptoCoinLocation = $basedir . 'icons/128/black/'. strtolower($coin['coinSymbol']) . '.png';
 if (file_exists($cryptoCoinLocation)) {
     $cryptoCoin = imagecreatefrompng($cryptoCoinLocation);

     $magnify = .71;
     $w = imagesx($cryptoCoin);
     $h = imagesy($cryptoCoin);
     imagecopyresampled($goldCoin, $cryptoCoin, 9, 9, 0, 0, $w * $magnify, $h * $magnify, $w, $h);
 }
//  add gold coin with cryptoicon
imagecopy($baseImage, $goldCoin, 760, 256, 0, 0, 110, 110);
Next, I add the transparent windowscreen over the coin and add other images to the top. I provide the height and width of each image, plus I give the x an y coordinates to move it to the right spot on the overall image. Again, finding the right x and y spot took some effort.
// add windowscreen
$windowScreen = imagecreatefrompng($basedir . 'headsWindshield.png'); //400 x 250
imagecopy($baseImage, $windowScreen, 634, 180, 0, 0, 400, 250);

// Add heads up display
$headsupSquare = imagecreatefrompng($basedir . 'headsUpSqare.png'); // 190 x 117
imagecopy($baseImage, $headsupSquare, 690, 256, 0, 0, 190, 117);

// add tiny rocket
$tinyRocket = imagecreatefrompng($basedir . 'tinyRocket.png'); //31 x 31
imagecopy($baseImage, $tinyRocket , 852, 576, 0, 0, 31, 31);
The last thing to add is all the text, which I passed into coin creating function as an array. One of the biggest issue with using the text is adding the font. After many trails, I found that putting in the path to where the font was, regardless of where my php page was, helped.
$fontname = '/images/fonts/data-latin.ttf';
Originally, I was able to get the font working by just putting a “.” in front of the font and a slash, but this didn’t work after I tried calling the image creating function outside of the image directory.
Once I had the font, it was just a matter of finding the right size and x/y coordinates to place the start of the text.
//add base text
imagettftext($baseImage, $generalSmallTextSize, 0, 566, 310, $generalTextColor, $fontname, 'Name:');
imagettftext($baseImage, $generalSmallTextSize, 0, 536, 340, $generalTextColor, $fontname, 'Symbol:');
imagettftext($baseImage, $generalTextSize, 0, 580, 40, $generalTextColor, $fontname, 'Arrival At Moon:');
imagettftext($baseImage, $generalTextSize, 0, 406, 66, $generalTextColor, $fontname, 'To The Moon Trip Completed:');
imagettftext($baseImage, $generalTextSize, 0, 596, 96, $generalTextColor, $fontname, 'Arrival At Sun:');
imagettftext($baseImage, $generalTextSize, 0, 422, 124, $generalTextColor, $fontname, 'To The Sun Trip Completed:');
imagettftext($baseImage, 10, 0, 778, 596, $generalTextColor,$fontname, 'To The Moon!    Coin Calculator by DeanLogic');
imagettftext($baseImage, 10, 0, 784, 614, $generalTextColor, $fontname, 'last update: ');

//add output text
imagettftext($baseImage, $outputSmallTextSize, 0, 630, 308, $outputTextColor, $fontname, $coin['coinName']);
imagettftext($baseImage, $outputSmallTextSize, 0, 630, 338, $outputTextColor, $fontname, $coin['coinSymbol']);
imagettftext($baseImage, $outputTextSize, 0, 846, 38, $outputTextColor, $fontname, money_format('%.2n', $coin['toMoon']));
imagettftext($baseImage, $outputTextSize, 0, 860, 64, $outputTextColor, $fontname, number_format($coin['tripMoon'], 3) . '%');
imagettftext($baseImage, $outputTextSize, 0, 846, 94, $outputTextColor, $fontname, money_format('%.2n', $coin['toSun']));
imagettftext($baseImage, $outputTextSize, 0, 860, 122, $outputTextColor, $fontname, number_format($coin['tripSun'], 3) . '%');
imagettftext($baseImage, 10, 0, 864, 614, $outputTextColor, $fontname, $coin['rowAdded'] . ' NEW YORK');
After everything was added to the image, then I return the final image to the output file.
// create the image for return file
imagepng($baseImage, $outputFile,9);
return $outputFile;
Since the output files are stored as the coin symbol name, it makes it easy to link to the image. For example, here is the BitCoin final image.
I wish I knew more about GD in order to try to do some filters and such, but I think there are some limitations. I would like for the icons to blend more with the coin and I still would like to give it the look as if the coin is spinning in space. But, for now, this will work for what is needed.
About DeanLogic
Dean has been playing around with programming ever since his family got an IBM PC back in the early 80's. Things have changed since BASICA and Dean has dabbled in HTML, JavaScript, Action Script, Flex, Flash, PHP, C#, C++, J2ME and SQL. On this site Dean likes to share his adventures in coding. And since programming isn't enough of a time killer, Dean has also picked up the hobby of short film creation.